Solar Panel Tilt Angle: Why It Matters and How to Find Yours
Discover why the solar panel tilt angle is critical for maximum energy efficiency, the difference between standard and ASHRAE-optimized formulas, and how to find yours.
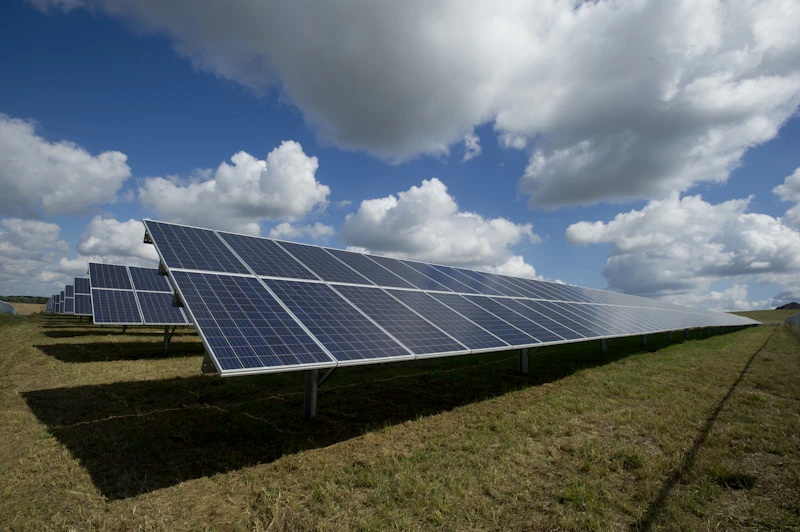
Setting your solar panels at the correct solar panel tilt angle is the difference between an energy-independent home and a system that underperforms by 10% to 30% annually. The angle of your panels dictates how directly solar rays hit the photovoltaic cells, directly impacting your daily kilowatt-hour (kWh) production.
In this guide, you will learn the exact physics behind solar panel alignment, how to calculate the optimal year-round and seasonal tilt angles for your specific latitude, and why standard “rules of thumb” often lead to suboptimal energy yields. We will also explore the critical difference between theoretical math and real-world installation constraints.
Why Solar Panel Tilt Angle Matters: The Cosine Projection Effect
To understand why the tilt angle is so critical, we have to look at the physics of solar irradiance.
When light strikes a surface at a perfect 90-degree (perpendicular) angle, the energy is concentrated over the smallest possible area, maximizing power density. If the surface is tilted away from the sun, the same beam of light spreads over a larger surface area. In physics, this is described by the cosine projection effect:
$$\text{Effective Irradiance} = \text{Direct Irradiance} \times \cos(\theta)$$
where $\theta$ is the angle of incidence (the angle between the incoming sun rays and the line perpendicular to the panel).
If your panel is tilted at 45 degrees when the sun is directly overhead, you lose approximately 30% of the potential solar power because the solar footprint is stretched. Aligning your panels to minimize this angle of incidence throughout the year is the primary goal of solar planning.
The Competitor Gap: Standard vs. ASHRAE-Optimized Formulas
Most online calculators rely on a generic rule of thumb: Tilt Angle = Latitude.
While this is a decent starting point for quick estimates, it fails to account for how light behaves as it travels through the Earth’s atmosphere. This atmospheric density factor, known as Air Mass (AM), measures the path length that light takes through the atmosphere relative to the path length directly overhead. At higher latitudes, the sun is consistently lower in the sky, meaning its rays must pass through a much thicker blanket of air. This scatters more light, reducing direct beam radiation while increasing diffuse (scattered) light.
To compensate for this atmospheric attenuation, scientists at the National Renewable Energy Laboratory (NREL) and ASHRAE (American Society of Heating, Refrigerating and Air-Conditioning Engineers) developed optimized formulas that adjust the recommended tilt angle dynamically based on latitude thresholds:
1. For Latitudes under 25°
- Formula: $\text{Tilt} = \text{Latitude} \times 0.87$
- Why: The sun is high year-round. Sticking to a strict latitude angle would tilt the panels too far during peak summer months, wasting potential energy capture.
2. For Latitudes between 25° and 50°
- Formula: $\text{Tilt} = (\text{Latitude} \times 0.76) + 3.1^\circ$
- Why: This formula strikes the perfect compromise, tilting panels slightly shallower during the summer to capture peak production hours while retaining enough angle to perform well in spring and autumn.
3. For Latitudes above 50°
- Formula: $\text{Tilt} = (\text{Latitude} \times 0.74) + 7.6^\circ$
- Why: At extreme northern or southern latitudes, tilting panels steeper than the latitude helps capture the low-hanging winter sun and prevents snow accumulation from blocking the cells.
To compare these models for your specific coordinates, you can use our interactive Solar Panel Angle Calculator, which allows you to toggle between these two methods and see the visual solar path and noon sun elevation in real time.
The “Self-Cleaning” 10-Degree Rule (A Professional Secret)
If you live near the equator—such as in Singapore (1.3° N) or Quito, Ecuador (0.2° S)—the mathematical formulas suggest your solar panel tilt angle should be virtually flat (0° to 1°). However, if you ask any professional solar installer, they will tell you that a completely flat solar panel is a recipe for system failure.
Here is why:
- Debris and Soiling: Wind carries dust, pollen, leaves, and bird droppings. When rain falls on a flat panel, the water pools instead of running off. As the water evaporates, it leaves behind a concentrated ring of dirt, known as “soiling.”
- Hot-Spot Damage: When dirt accumulates on a specific part of a panel, it creates localized shading. The shaded solar cells stop producing energy and instead begin acting as resistors, consuming energy generated by the surrounding cells. This causes them to heat up dramatically, potentially leading to permanent cell damage or fire hazards.
- Rainwater Runoff: To enable the natural self-cleaning process of rainwater, solar panels must be mounted at a minimum tilt angle of 10° to 15°.
Even at the equator, a 10° tilt angle only reduces annual energy production by less than 1.5% compared to a perfectly flat mount, but it saves hundreds of dollars in manual cleaning costs and preserves the lifespan of your system.

Optimal Orientation: Compass Direction (Azimuth)
Tilt is only half of the equation; you must also align your panels horizontally. This compass direction is referred to as the azimuth angle.
The rule for azimuth is simple: your panels should face the equator.
- Northern Hemisphere: Face panels True South (180° azimuth).
- Southern Hemisphere: Face panels True North (0° azimuth).
Geographic vs. Magnetic South
A common mistake DIY installers make is using a standard handheld compass to align their mounts. Compasses point toward magnetic South/North, not geographic (true) South/North. The difference between these two points is called magnetic declination, and it varies by location.
For example, in New York, the magnetic declination is about 12 degrees West, meaning a compass reading of South is actually 12 degrees off from true South. Always use GPS-based coordinates or check local declination charts to ensure you are aiming for true geographic alignment.
Fixed vs. Adjustable Mounts: Is Seasonal Adjustment Worth It?
As the seasons change, the sun’s path across the sky rises and falls. In the winter, the sun remains low on the horizon, while in the summer, it passes almost directly overhead. Adjusting your panels’ tilt angle throughout the year can optimize energy collection:
- Winter Tilt: Latitude + 15° (steeper to capture the low winter sun).
- Summer Tilt: Latitude - 15° (flatter to capture the high summer sun).
Here is a breakdown of how different adjustment schedules perform:
| Mounting Strategy | Adjustment Frequency | Potential Energy Gain | Best Suited For |
|---|---|---|---|
| Fixed Year-Round | None (Permanent tilt) | Baseline (100% production) | Standard residential installations, grid-tied homes. |
| 2-Season Adjustment | 2x per year (Spring & Autumn) | + 4% to 6% annual yield | Off-grid cabins, remote telecommunication stations. |
| 4-Season Adjustment | 4x per year (Solstices & Equinoxes) | + 7% to 9% annual yield | DIY enthusiasts, ground-mounted homestead arrays. |
| Single-Axis Tracker | Continuous (Automatic daily tracking) | + 20% to 25% annual yield | Large utility-scale solar farms. |
The Reality of Seasonal Adjustments
For a standard residential rooftop installation, seasonal adjustment is almost never worth the effort and risk. Climbing onto a sloped roof twice or four times a year to adjust heavy metal brackets is dangerous. Furthermore, adjustable mounts are more expensive and introduce mechanical points of failure.
However, if you are building an off-grid system or a ground-mounted array, seasonal adjustments are highly beneficial. During the winter, when daylight hours are short and battery banks are strained, tilting your panels steeper (up to Latitude + 15°) can boost winter production by up to 15% when you need it most.
If you are planning to install panels on your roof, you should also estimate the total physical capacity of your roof space. Using our Solar Panel Roof Estimator can help you determine how many panels will physically fit on your roof based on its slope, dimensions, and local fire code setbacks.
From the Field: A Real-World Lesson in Solar Tilt
A Real-World Observation
“When I helped my brother install a small off-grid solar array for his remote cabin in upstate New York (latitude 43° N), we initially set the panels at a fixed year-round tilt of 36° (using the ASHRAE-optimized formula). During the summer, the system generated more power than the batteries could store. But when November hit, the short days and low-lying sun left the cabin constantly running out of power by 5 PM.
The following autumn, we swapped the fixed mounts for adjustable brackets and tilted the panels to 58° (Latitude + 15°). The results were immediate: our winter daily energy harvest jumped by nearly 18%, completely eliminating the need to run a noisy backup gas generator on overcast days. If you are off-grid, optimizing for winter tilt is a lifesaver.”
Real-World Factors That Override the “Perfect” Angle
While the mathematical formulas give you the absolute peak angle for clean solar capture, real-world conditions often require compromises.
- Roof Pitch Constraints: Most residential solar panels are installed flush against the roof. If your roof has a 20-degree pitch and your optimal angle is 35 degrees, it is rarely cost-effective to install bulky “tilt legs” to prop the panels up. The cost of the additional racking and the increased wind load on your roof outweigh the 2-3% energy loss from mounting flush.
- Local Shading: If you have tall trees or a neighboring chimney to the south of your installation, you may need to adjust your orientation. It is often better to rotate panels slightly East or West to avoid afternoon shade than to face them South directly into a tree’s shadow. You can use our Shadow Length Calculator to project shadow sizes at different times of the day to make sure your panels stay clear.
- Carbon Offsets and System Size: Before finalizing your solar investment, it is helpful to calculate your potential carbon footprint reduction. By using our Personal Carbon Calculator, you can see the direct environmental impact your solar array will have by offsetting coal or natural gas power generation.
Final Checklist: Finding Your Optimal Tilt Angle
To recap, here is the step-by-step process to find and implement your optimal solar panel tilt angle:
- Determine your latitude: Find your coordinates using a GPS or online map.
- Choose your calculation method: Use standard rules for a quick guess, or the ASHRAE-optimized formula via the Solar Panel Angle Calculator for maximum precision.
- Apply the self-cleaning rule: Ensure your tilt is at least 10° to 15° to prevent water pooling and debris accumulation.
- Verify orientation: Face true geographic South (Northern Hemisphere) or true geographic North (Southern Hemisphere), compensating for magnetic declination.
- Determine if seasonal adjustment is right for you: Stick to fixed mounts for grid-tied roofs; opt for adjustable brackets for off-grid or ground mounts.
Conclusion
Finding the right solar panel tilt angle is one of the most effective ways to maximize the return on your solar investment. By moving beyond generic rules of thumb and accounting for your local latitude, atmospheric scattering, and real-world debris runoff, you can ensure your system operates at peak efficiency for decades to come.
Start planning your layout today by using our free Solar Panel Angle Calculator to visualize your local sun paths, and check your roof’s physical capacity with the Solar Panel Roof Estimator.